
Software: Hugo, ufw, deja-dup, git, and GitHub.
You must be thinking I’m about to start installing the blog packages, right? No, no, no—we’ve just finished setting up the hardware, so of course we’re going to go through the basic security measures for server software step by step!
1. Enable the firewall
In this age of hackers and malicious attacks, always remember that anything connected to the internet has no secrets—it can be a target for attack. A firewall is essential for protecting your server. (Linux’s layered permission controls can already block most malware, but if you’re still concerned, you can take it a step further by installing additional antivirus and scanning software.)Getting back to the point, once you’ve confirmed that the hardware supports remote connections, you should immediately enable the firewall. The following commands are entered in the command line of a computer on the same subnet:
# ssh -Y pi@<the designated LAN ip>
Remotely connect to the Raspberry Pi server and install a firewall (surprise—the official system image doesn’t come with a pre-installed firewall)
$ sudo apt update
$ sudo apt install ufw
$ sudo ufw enable
The first line updates the installed apt packages, the second line installs the firewall, and the third line enables the firewall. The ufw firewall typically allows SSH connections, so you can ignore the system warning that some connections may be disconnected when starting the firewall.Linux firewalls are very easy to manage, and there are plenty of simple command-line tutorials online, so I won’t go into detail here. However, I’d like to remind you of one thing: if you encounter any difficulties during the following steps, try disabling the firewall as your first troubleshooting step. If the firewall is the issue, open the relevant ports or allow specific applications to pass through the firewall, then restart the firewall.
Please note: I must emphasize once again that a firewall is only basic protection. You can install additional antivirus software to protect your server, but more importantly, you must remain vigilant and follow the [Hacker’s Code of Conduct](https://youtu.be/Z2TtWeVK8CI
) that Lao Gao mentioned, putting it into practice at all times:Do not open emails or attachments from unknown sources; do not visit suspicious websites; do not share your account credentials; do not plug unknown USB devices into the server; and do not install software from unknown sources. Alright! So our second step is to change the Raspberry Pi’s username and password—otherwise, it’s like sharing your login credentials with every Raspberry Pi newbie in the world!
2. Changing the Default Username and Password
Many tutorials on changing usernames and passwords use the Linux root account to modify existing accounts, but my Raspberry Pi simply won’t let me log in as root. I’m not sure if it’s because I’m doing something wrong or if this particular Linux distribution for the Raspberry Pi doesn’t allow root logins by default. No problem,we’ll create a new user with sudo privileges to change the existing password and get rid of the default “pi” username.
$ sudo adduser temp0
You’ll need to enter a password for this temporary account twice, and answer a series of questions about your name, phone number, etc. You can press Enter to skip everything except the password.For the temporary account’s password, I’ll just use a simple numeric code—we’ll be deleting the temporary account anyway. Next, grant it sudo privileges and switch to the temp0 account: `
% sudo usermod -aG sudo temp0
% su temp0
You’ll be prompted for the temporary account’s password. Once logged in astemp0, you can modify the original default account.
% sudo usermod -l <new username> pi
% sudo usermod -d /home/<new username> -m <new username>
% exit
$ sudo deluser --remove-home temp0
$ sudo deluser temp0
On the first line, change the default username; on the second line, change the home directory associated with the new username to the new username.Now that the default username and its corresponding home directory have been changed to ``<new username>
, the temporary account’s days are numbered. The last three lines switch back to the newly renamed original account, then delete the temporary account and its home directory. But we’re not done yet—Linux accounts also belong to groups. We can use ``$ groups
to check if thepigroup still exists, then run
$ sudo groupmod -n <new username> pi
to set the group name to match the new username.Next, we change the default password:
$ sudo passwd <new username>
. We can use ``$ groups
to check if the group has been renamed successfully, ``$ ls /home
to verify that the home directory has been renamed, and ``getent passwd {1000..6000}
` to confirm that the temporary account no longer exists.
3. Regular Backups
a. Backup Strategy
As the saying goes, “You can’t predict what the future holds.” Before we invest any effort, we must first consider how to recover in the event the server suffers from natural disasters or human error. In mechanics, there are Newton’s three laws of motion; in thermodynamics, there are the “three laws”—which are actually four principles; even robots are governed by three laws; and, unsurprisingly, the world of backups also has three ironclad rules:
- Three copies
- Two storage media
- At least one off-site backup
Here, we’re establishing a backup strategy for our blog directory. All future blog posts will be installed and written to this directory, ensuring that even if the sky falls, we can recover the blog data without having to start from scratch.This backup strategy must satisfy the 3-2-1 rule mentioned above while also catering to my own laziness: the three copies of data are stored on the Raspberry Pi server for editing, backed up daily via Deja-Dup to a hard drive mounted on my home NAS, and on GitHub, which offers both unlimited cloud storage and version control. This setup utilizes a variety of storage media, including SSDs, HDDs, and enterprise servers. Placing the NAS in a different room and hosting the GitHub server in a different region fulfills the requirement for off-site backup.
This backup strategy also achieves the core philosophy of this site (laziness): Deja-Dup handles regular automatic backups, and GitHub operations can be automated via a Bash script integrated with a Linux systemd service.The first of the three copies requires me to write the content myself (maybe I’ll set up an RNN to automatically generate blog posts later), so I can lazily maintain the blog without worrying about forgetting to back it up.
Some might ask, “Why not use Deja-Dup to back up to Google Drive?” Well, that would require registering a Google Drive account with Pi OS first, but I haven’t found a place in Pi OS to configure an online account. Another reason is that free Google Drive accounts have limited storage; perhaps one day my blog will grow beyond the cloud storage limit.So here, I’m using Deja-Dup with my home NAS, and leveraging GitHub’s unlimited storage as a backup destination. At the same time, I can use Git commands to recover files if I accidentally delete them.
Also, someone might ask: since I’m using GitHub, why not just host the blog directly on GitHub, which is free and has unlimited storage?Good question. You could certainly do that, and there are plenty of tutorials online to help you. But the point here is that I want to set up my own Raspberry Pi blog server—the title isn’t just for show. Tinkering with a DIY blog server is a man’s romance: falling into countless pits, then climbing back out. It’s like the saying, “Three broken arms make a good doctor” (though you might end up disabled)—it’s just so romantic, don’t you think?At the very least, hosting the server on a tiny Raspberry Pi puts total control in my hands—no need to worry about someone else shutting down my blog or account one day. And if we take it a step further, writing posts, uploading photos, and editing files on my home network is lightning-fast. There’s zero lag—the webpage updates the moment I save a file, so I’m less likely to get frustrated.
Great! Now that we have a backup strategy, all that’s missing is the content to back up. Let’s pause Chapter 3 for now and return to implement this truly extraordinary backup plan after we’ve set up a basic blog in Chapter 4.
4. Setting Up a Site with HUGO
We’ve finally reached the crowning jewel of this series: static websites. Back when I was learning web design—in the days of dragging boxes around in Dreamweaver—setting up a blog was practically impossible. But times have changed, and our tools have evolved significantly. Now we have Static Site Generators (SSGs). According to [online rankings](https://jamstack.org/generators/
),the top three SSGs are Next.js, Hugo, and Gatsby. All three are known for being lightweight, high-performance, and fast to set up, and each has its own [pros and cons](https://www.gatsbyjs.com/features/jamstack/gatsby-vs-nextjs-vs-hugo
).However, I chose HUGO, which is written in Go, not as a tribute to the great author Victor Hugo, but because its blog uses Markdown syntax. My favorite editor, Vim, happens to have a built-in conceallevel setting that visualizes Markdown markup. So, driven by this tiny little motivation, I decided to give HUGO a chance—and give myself a chance too.
Enough chit-chat. HUGO offers multiple installation methods, and I chose the most brainless approach: downloading pre-compiled executables for different platforms directly from the [release archive](https://github.com/gohugoio/hugo/releases
). The version compatible with my Raspberry Pi is [hugo_0.87.0_Linux-ARM.tar.gz](https://github.com/gohugoio/hugo/releases/download/v0.87.0/hugo_0.87.0_Linux-ARM.tar.gz
), which is 13.6 MB in size.
$ mkdir -p <HUGO project>; cd <HUGO project>
$ wget https://github.com/gohugoio/hugo/releases/download/v0.87.0/hugo_0.87.0_Linux-ARM.tar.gz
$ tar -xvf ./hugo_0.87.0_Linux-ARM.tar.gz
$ sudo mv ./hugo /usr/bin/
$ hugo new site <your site name>
The first four lines download and extract HUGO. After extraction, place it in the Raspberry Pi system’s binary folder to make it a system command. The last line generates the static website you want. This gives you the basic code for a website framework—it’s super fast.
Next, go to the [HUGO theme page](https://themes.gohugo.io/
) to pick a web theme you like. There are also some tag categories on the right to help you choose. Here, I chose “dream.”If you choose a different theme, you can modify the following command: `
$ cd <your site name>\themes
$ git clone <your theme's git>
$ cd <your theme's name>
$ rm -rf .git; rm -rf .github
. The ``<your theme's git>
part can be obtained by clicking "Download" on the individual theme page to go to its GitHub page; clicking the green "Download Code" button there will give you a URL starting withhttps://and ending withgit. The name of the downloaded folder is ``<your theme's name>
`. The last line removes the Git and GitHub settings and version history for that theme.We will initialize Git version history for our website when we return to the backup section in Chapter 3. Deleting the theme’s version history here will simplify full-site backups later on, eliminating the need for Git submodules.
Next, return to the website folder (<yout site name>
) and create a bash script to launch the site: `
$ cd ../../
$ vi startHugoServer.sh
. Add the following two lines to the script:
#!/bin/bash
hugo server -b "http://localhost" --bind <your designated LAN ip> --appendPort=false --port=1313
. The first line specifies that this file should be executed by bash, while the second line configures the network settings for the Hugo server. For now, the URL is set to localhost, bound to the address assigned to the Raspberry Pi in the previous section: ``<the designated LAN ip>
`. The listening port is set to 1313.After saving the file, you can start the website.
$ sudo ufw allow 1313
$ sudo chmod +x ./startHugoServer.sh
$ screen -S <hugo session>
$ ./startHugoServer.sh
<ctrl>+a+d
The first line opens port 1313 in the firewall; the second line allows execution of the script we just edited; the third line creates a screen session named ``
`; and the fourth line runs this script to start the HUGO server within the new session. Once the HUGO server is running, the command line will continue to log the website’s activity. Therefore, before this fourth step, I prefer to start a session so that the HUGO server can continue running in the background even after I exit the session in step five.
Now you can open your browser, type<the designed ip>:1313
into the address bar, take a deep breath, and press Enter—your blog site will appear.
To make it look nice, I created two empty blog posts in the command line before opening the browser:
$ hugo new posts/my-first-post.md
$ hugo new posts/my-second-post.md
. The screen you see in the browser should look something like the image below
|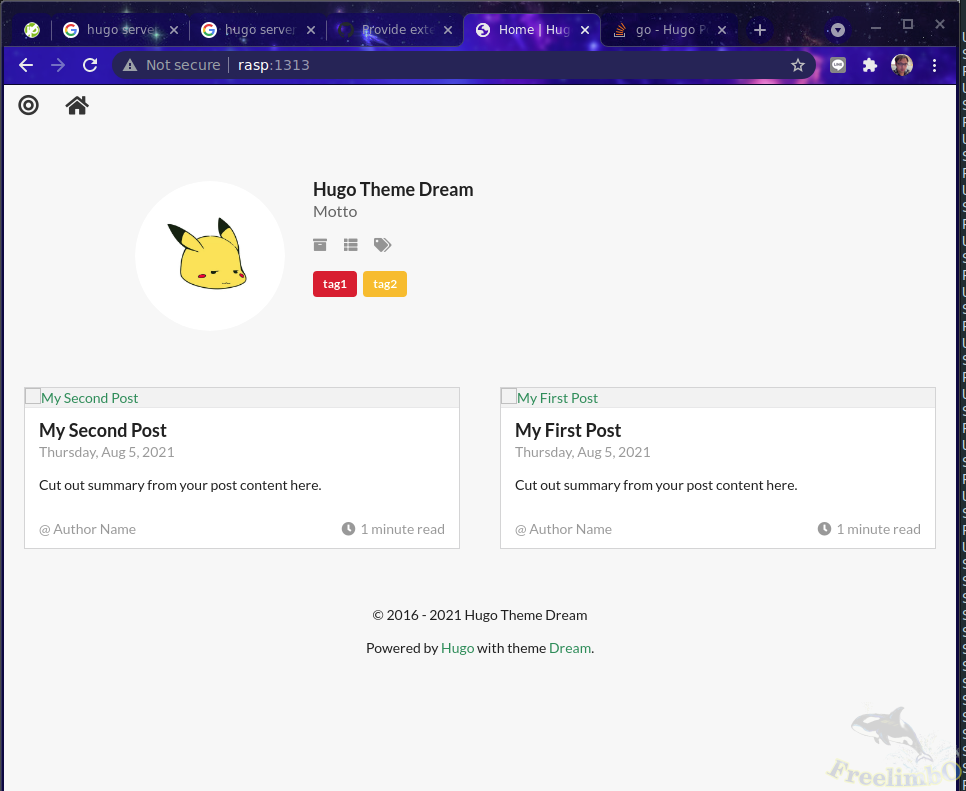
| New blog |
Pretty simple, isn’t it? There’s still a long way to go in website setup. In the next post, we’ll back up this site.